"No matter how terrified you may be, own your fear and take that leap anyway because whether you land on your feet or on your butt, the journey is well worth it."
-- Laurie Laliberte
"If your dreams do not scare you, they are not big enough."
-- Ellen Johnson Sirleaf
"Life shrinks or expands in proportion to one's courage."
-- Anais Nin
Showing posts with label towel. Show all posts

Sunday, February 23, 2014

Call Me a Tease if You Must . . .

. . . just so long as you call me. ;)

Hey all! I've been sick, and working, and working, and sick. Right now, my priorities include projects with Tony Healey, Bernard Schaffer, Reeni Austin, and a newbie by the name of Tony DePaul. However, we all know I try to squeeze in some crochet time whenever I can because it maintains my sanity.

Of course, crochet for me is more than just pleasure; it's work. Rarely do I crochet only for the love of the craft. Chances are, if you see a hook in my hand, I'm working on a gift for a friend, an item for a craft show, or a sample for a new pattern.

Over last weekend, it was a sample called "Movie Night." I actually sketched out the design two or three years ago and then it sat, waiting for me to get back to it. The problem with the creative process, whether designing crafts, writing music, or writing prose or poetry, is that when it rains, it pours.

Once I get started, I can't stop. I sketched out about fifteen designs all at once and this one got lost in the shuffle, but it's always been in the back of my mind to finish it. I even bought the yarn for the sample way back when.

You see, the reason I named it "Movie Night" is that it was inspired by the red-and-white striped boxes that the old theatres used to serve popcorn. The basic design will be on a plane of white with red stripes in the form of post stitches and embellished with yellow popcorn stitches.

I've only reached the point where the pattern for the towel is worked out and written, but I'm pretty excited about it.

Meanwhile, the latest crochet book is well on its way to being finished. All of the samples are done except for one which needs pictures to be taken step-by-step for part of the pattern. And the clearer, more formal writing of the instructions and formatting need to be laid out.

So what else could I possibly have going on? Well, there's a serial I'm co-writing with Tony Healey that I hope we'll be able to reveal officially next month, and a couple of story ideas I'm developing with/for Reeni Austin that I hope we'll be able to publish within the next couple of months. That one's been slower going than I expected. Friends, a word of advice: writing is fairly easy, but writing romance is HARD!

Anyhow, I'll keep you posted, so stay tuned.

Namaste.

Sunday, May 20, 2012

Put down Your Book and Pick up Your Hook

Haven't we had enough of reading around here for a little while? I think it's time to get our crochet on and I've found the perfect way to do it. A while back, Samantha emailed me and told me about these great towels she makes using a portion of my Big Girl Towel pattern. I can't remember how it all went down, but we basically decided that she should write up a tutorial that we could each post on our blogs. I think you'll agree with me that the towel and the yarn colors she used for her example are awesome. (I love pink.) Anyhow, please welcome Samantha and her rockin' kitchen  towels.

Hi Everyone!!
I have been asked a few times how I make my Kitchen Towel Toppers:
The crocheted top I use is fashioned after top of Laurie’s hanging kitchen towel patterns (I have most of them), so I asked her if she minded if I created a tutorial and I use her pattern for reference.  Her idea was for me to do this guest post and I happily agreed.
I have made these using worsted weight yarn and dk weight yarn.  I think you could easily adapt it for other weights as well.


Materials needed to start:


·         Yarn
·         Scissors
·         Towel
·         Needle (I use a tapestry needle, but that means I need a thimble to push it through sometimes)
First thing you need to do is cut the towel in half.  You really only need one half of the towel and on the plus side you get more for your money!


I don’t really worry about this being perfectly straight because in the end it is going to be somewhat gathered.
After the cut is made, thread your needle with a long piece of yarn.  I now make mine really long because one time I made it too short and had to redo it and that was not fun.


Next you want to fold down the top of the towel like so:


Folding the towel down like this makes it so you don’t have any raw edge exposed.
Next we want to put the needle through so that the knot is on the edge in the back.


Then we want to start doing the blanket stitch (youtubetutorial found here) across the top of the towel.  Make sure to continue to fold the very top down so the cut edge is not exposed.  You can pin this edge if you want to make it easier for you.


Here’s how mine looks from the back with the top folded down.


Once you have gone all the way across make sure you knot it in the back.


We are going to put one sc in each blanket stitch, so make sure to keep the stitches fairly close together.  Although the thicker the yarn you use the farther apart the stitches can be.  I am using dk yarn in this example.
Now you can start doing sc across the blanket stitch.  I use a larger hook than recommended for the yarn with these, but it is all what you are comfortable with.


Now once you get to the end just chain one and do a few more sc rows.  For worsted weight I tend to do 4 rows, but for this example in dk I did 5 rows.


If it starts to pull in a little that is okay.  We are going to start gathering it and decreasing anyway.
This is where I start to use Laurie’s pattern (Free Big Girl Kitchen Towel).  We want to sc dec
(A sc dec is insert hook into both loops of first stitch being worked, yo, pull up a loop, insert hook into both loops of next stitch, yo, pull up a loop, yo, draw through all 3 loops on hook)
over the next few rows to get down to 6 stitches.  Now this all depends on how many stitches you have.  In this example I have 54 stitches. 
So first row I just do sc dec all the way across and I end up with 27 stitches.


Next I sc dec 7 times, 1 sc, sc dec 6 times to get to 14 stitches.


Then I did sc dec 2 twice, dec over 3 stitches twice, then sc dec twice to get down to 6 stitches.
(dec over 3 stitches is insert hook into both loops of first stitch being worked, yo, pull up a loop, insert hook into both loops of next stitch, yo, pull up a loop, insert hook into both loops of next stitch, yo, pull up a loop, yo, draw through all 4 loops on hook)


Once down to 6 stitches, chain one and sc across.


Continue making the 6 stitch rows


I did about 20 rows.
Next, once it is long enough you will do the row that will become your button hole. 
From Laurie’s pattern:
Note:  Before proceeding, you may wish to fit your hanging loop to the place where you'd like it to hang.  If worked as instructed it will fit the average drawer pull or oven door handle.  If you need to add length simply continue repeating Row 64 as necessary.
Row 82:  ch3 (counts as dc), trc in next st, dtrc in next 2 sts, trc in next st, dc in next st, turn (6 sts)
Note:  The space between the two dtrc is your buttonhole.

Next you want to chain one and sc in the first two sts, two sc in each of the next two sts, and then sc in the last two sts, do not bind off.


Next, you want to sc down the side and stop right where you started the decreases.


Fasten off, then start on the other side where the decreases started.


Fasten off and weave in ends.


Sew on a button of your choice.


Sam, I can't thank you enough for dropping in to do this. I LOVE this idea and am going to have to make a couple for a friend this week.

By the way, folks, you can find Samantha's blog HERE.

Happy Crocheting!

Sunday, March 11, 2012

A Sneak Peek... In Pictures

I was really hoping today to be able to make the big announcement, but things don't always go according to plan. That's okay, we drop back and punt. Instead, I'll hand you a sneak peek at the upcoming release of my first crochet pattern book. The book, titled Quick Crochet for Kitchen and Bath will include a total of twelve patterns from three of my collections. Scroll down for pictures of all twelve. (squee!)

For at least the first 90 days the book will be available exclusively on Amazon. It will be offered in mobi format for Kindle and in print. Because of this, I'll have to pull the patterns from Etsy and Ravelry, so below the photos, I'll share with you a clearance bonus going on in my Etsy shop right now.

 your first look at the cover by Glendon Haddix of Streetlight Graphics
the bread basket collection
the X-Factor collection
the Dominoes collection

The various parts of what has become Quick Crochet for Kitchen and Bath were mostly gone from my Etsy shop, but there were still five listings that would need to be pulled. I decided to move those five listings to a CLEARANCE section and change them to include all twelve patterns. Until they sell, or the book's release, the listings will be available at the mobi (Kindle) price. They will not be Kindle files; they will be pdf files.

You will receive all twelve patterns, in the pdf format, for $4.99. If you were to buy those separately, the way I've sold them in the past, you would pay $22.44. That's the bundle price, not the individual pricing. So, if you prefer pdf files, grab them now (all 12 for $4.99). I have not yet decided whether I will make the pdf files available again after my 90 days with Amazon is done. That will depend on how the e-book does.

The print edition is a separate entity and will not be affected. In fact, it's possible the print edition will be available in a few local yarn shops in the near future. Regardless, my blog will feature a link direct to the book as soon as Amazon has it. Most likely the print edition will be available first.

Sunday, August 29, 2010

You've Waited So Patiently: Free Crochet Pattern

When I posted the free pattern for the Big Girl Dish Scrubby last month I really didn't expect it to be such a hit.  To date, it has received 106 hearts and it's in 26 queues!  More than that, it's brought some very positive attention to my other patterns and I can now support my yarn habit without tapping into an already too tight budget.  So, rather than simply say thank you to the many folks who had their crochet hooks in helping me do this, I offer a gesture of thanks:

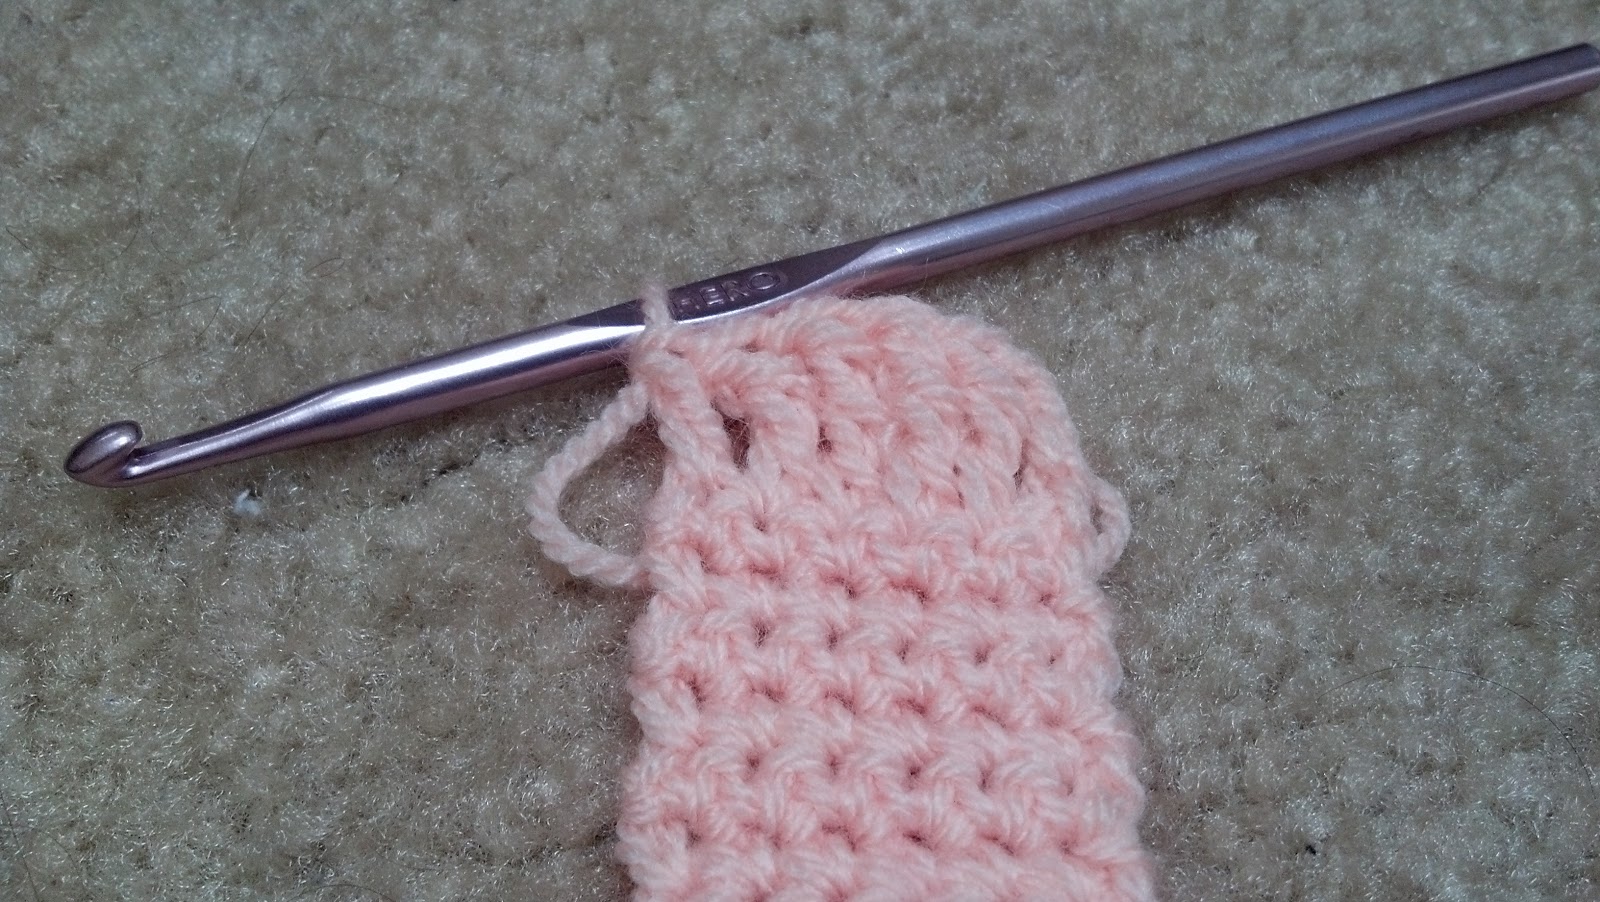
A short while ago I promised matching pieces and I've finally set down to keep that promise.  So, with no further ado, I offer the Free Big Girl Kitchen Towel.....and a tease.  The tease is a work in progress and will be my next free pattern offered here.  You'll see it in a couple of the pics in this post.


All instructions use American terminology and standard abbreviations.

Supplies Needed:
about 5-6 oz. of worsted weight cotton yarn (that's about 3 balls of Peaches n Creme or Lily Sugar n Cream)
size I-9 (5.5 mm) crochet hook
one button about 1 1/4" in diameter
yarn needle and/or traditional sewing needle for attaching button and weaving in ends
stitch markers or scraps of yarn for row counting (optional)

Special Stitches Used:
single crochet decrease (sc dec) -- insert hook into both loops of first stitch being worked, yo, pull up a loop, insert hook into both loops of next stitch, yo, pull up a loop, yo, draw through all 3 loops on hook
double triple crochet (dtrc) -- yo 3 times, insert hook into next st, pull up a loop, [yo, pull through 2 loops] 4 times

ch 48

Row 1:  sc in 2nd ch from hook and in each ch to end, turn (47 sc)

Row 2:  ch1, sc in 1st sc, [ch1, sk next sc, sc in next sc] rep to end, turn (47 sts)

Row 3:  ch1, sc in 1st sc and 1st ch1 sp, [ch1, sk next sc, sc in next ch1 sp] rep to end, sc in last st, turn (47 sts)

Row 4:  ch1, sc in 1st sc, [ch1, sk next sc, sc in next ch1 sp] rep across ending w/ sc in last sc, turn (47 sts)

Row 5:  rep Row 3

Row 6:  ch1, sc in 1st sc and in each sc and ch1 sp across, turn (47 sc)

Row 7:  ch1, working in back loops only sc in each st across, turn (47 sc)

Row 8:  ch1, working in front loops only sc in each st across, turn (47 sc)

Row 9:  rep Row 7

Row 10:  ch1, working in front loops only sc in 1st sc, [dc in next st, sc in next st] rep to end, turn (47 sts)

Row 11:  ch1, working in back loops only sc in 1st sc, [sc in next dc, dc in next sc] rep across ending w/sc in last sc, turn (47 sts)

Row 12:  ch1, working in front loops only sc in 1st sc, [dc in next sc, sc in next dc] rep across ending w/sc in last sc, turn (47 sts)

Rows 13-14:  rep Rows 11-12

Row 15:  ch1, working in back loops only sc in each st across, turn (47 sc)

Row 16:  ch1, working in front loops only sc in each st across, turn (47 sc)

Rows 17-18:  rep Rows 15-16


Row 19:  ch1, sc in 1st sc, [ch1, sk next sc, sc in next sc] rep to end, turn (47 sts)

Row 20:  ch1, sc in 1st sc and 1st ch1 sp, [ch1, sk next sc, sc in next ch1 sp] rep to end, sc in last st, turn (47 sts)

Row 21:  ch1, sc in 1st sc, [ch1, sk next sc, sc in next ch1 sp] rep across ending w/ sc in last sc, turn (47 sts)

Rows 22-59:  rep Rows 20-21

Row 60:  ch1, sc in each sc and ch1 sp across, turn (47 sc)

Row 61:  ch1, sc dec 12 times, sc in next st, sc dec 11 times, turn (24 sts)

Row 62:  ch1, sc dec 12 times, turn (12 sts)

Row 63:  ch1, sc dec 6 times, turn (6 sts)

Row 64:  ch1, sc in each st across, turn (6 sts)

Rows 65-81:  repeat Row 64

Note:  Before proceeding, you may wish to fit your hanging loop to the place where you'd like it to hang.  If worked as instructed it will fit the average drawer pull or oven door handle.  If you need to add length simply continue repeating Row 64 as necessary.

Row 82:  ch3 (counts as dc), trc in next st, dtrc in next 2 sts, trc in next st, dc in next st, turn (6 sts)

Note:  The space between the two dtrc is your buttonhole.

Row 83:  ch1, sc in each of 1st 2 sts, 2sc in each of next 2 sts, sc in each of next 2 sts

Finishing Round:  beginning with last stitch in which you worked, sc around working 3 sc in corners and stopping at Row 82, join w/sl st in 1st sc of Row 83, fo, weave in ends

Attaching button:  Fold end of narrow strip and attach button at desired position making sure that the hanging loop made by this fold allows enough room for you to hang your towel where you wish to hang it.  Take care to attach the button loosely enough that there is sufficient space behind it for the thickness of your fabric.


Note:  This pattern has not been tested.  I made it; I wrote it; I'm posting it; done.  If you find any mistakes or have suggestions for clarification, please email me or leave a comment here (preferred).

About my work:


Any pattern I design and post here is my property. Please do not duplicate my patterns for any reason especially to sell. Instead, please link to my blog or to the pattern page when referencing one of my patterns.

You are more than welcome to offer finished items made from my patterns for sale. I see no reason why you should not profit from your hard work. However, I'd really appreciate it if you gave me credit for the design; please reference my blog or the pattern page.

If you do make any of my patterns, I'd love to see your finished items; please feel free to email pictures to me.

If you are not interested in making your own pieces, I occasionally offer finished items in my shops on Etsy and Bonanzle. I also welcome special orders, so email me and let's work together.

BigGirlJewelry@yahoo.com